Mostrar mensagens com a etiqueta receita. Mostrar todas as mensagens

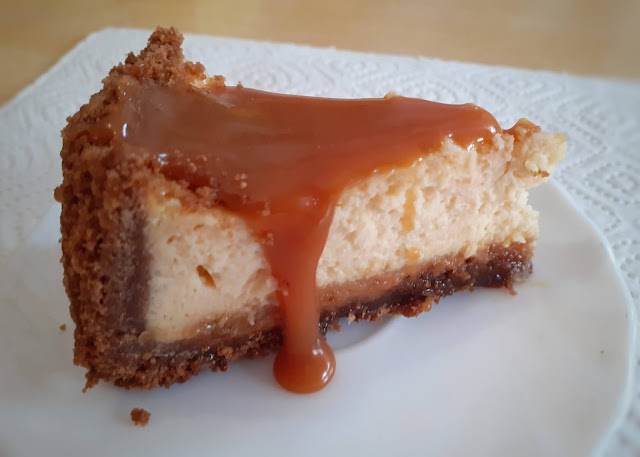
Cheesecake de caramelo

cheesecake de caramelo


Leram bem!

Vou partilhar a receita de um delicioso cheesecake de caramelo!

É muito simples, tem todo o sabor, é de comer, e... comer mais! (Só se chora na última fatia) Tem uma maravilhosa camada de caramelo entre a base de bolacha e o recheio, por isso, tem tudo para ser um sucesso.

Não é por nada, mas fiquei encantada com a possibilidade de fazer cheesecakes com iogurte. Sim, deixa de ser um cake de cheese, mas fica lá perto, até pelas texturas que são semelhantes. E o sabor? O sabor é maravilhoso!

Nesta receita usei uma forma pequena; se forem usar uma forma maior, sintam-se à vontade para usar o dobro dos ingredientes.


cheesecake de caramelo


Cheesecake de caramelo


Ingredientes:


Base:

  • 200g de bolacha Maria
  • 100g de manteiga
  • 1 ou 2 colheres de sopa de água, se necessário

Recheio: (todos os ingredientes à temperatura ambiente):

  • 400g de iogurte grego
  • 100g de açúcar
  • 1 c. de sopa de açúcar baunilhado
  • 1 pitada de sal
  • 2 ovos
  • 1 c. sopa de amido de milho

Caramelo:

O caramelo desta receita é o deste post.


Preparação:


Base:

Pré-aquecer o forno a 180 ºC.

Derreter a manteiga. Triturar as bolachas. Misturar a manteiga derretida com as bolachas. Se a mistura estiver muito seca, acrescentar uma ou duas colheres de sopa de água, para conferir um pouco mais de humidade. Colocar numa forma de mola previamente untada com manteiga e com o fundo forrado a papel vegetal, e alisar, pressionando ligeiramente, e abrangendo também um pouco as laterais da forma. Assar durante 10 a 12 minutos, até dourar nas bordas.

Deixar arrefecer e reservar.


Caramelo:

Ao caramelo preparado com esta receita retirar cerca de 1 chávena. Levar ao lume, para o aquecer, e colocar 2 colheres de sopa rasas de farinha (sem fermento). Misturar muito bem para incorporar, sem deixar grumos e deixar cozinhar cerca de 1 minuto.

Este caramelo ficará mais espesso e será colocado no fundo da base. Por ser mais espesso, não irá desaparecer no recheio do cheesecake aquando da cozedura.

Estando pronto, colocar este caramelo no fundo da base do que será o cheesecake. Deixar arrefecer.


Recheio:

Bater bem o iogurte grego com o açúcar, a pitada de sal e o açúcar baunilhado durante 3 minutos até estar tudo bem dissolvido.

Adicionar os ovos, um a um, batendo bem entre cada adição.

Por fim, acrescentar o amido de milho e bater bem.

Verter o creme do cheesecake na base (já com o caramelo), e levar ao forno, pré-aquecido a 180 ºC, durante 30-40 minutos (pode demorar mais tempo, dependendo da altura da forma que utilizarem).

Deixar arrefecer e colocar no frigorífico durante pelo menos 3h.

Antes de servir o cheesecake, passar uma faca entre o cheesecake e a forma para garantir que está totalmente solto, abrir a forma, remover com cuidado e passar o cheesecake para um prato de bolo ou outro suporte. Podem usar o molho de caramelo que restou (o sem farinha) para colocar por cima do cheesecake, ou colocar esse molho de caramelo a gosto, na fatia que estiver a ser servida.


Molho de caramelo caseiro

Quem é fã de caramelo?

Eu sou de certeza! E é tão fácil fazer um caramelo caseiro. Com poucos ingredientes e um pouco de paciência, nunca mais vão querer comprar caramelo!

Esta receita de caramelo, estilo toffee, serve para inúmeras receitas: podem usar em bolos, gelados, cheesecakes, enfim! Um sem número de hipóteses e opções deliciosas.


receita de molho de caramelo caseiro


Vamos então à receita?

Molho de caramelo caseiro


Ingredientes:

  • 350g de açúcar
  • 50g de manteiga à temperatura ambiente
  • 200ml de natas à temperatura ambiente
  • 50ml de água quente

Preparação:


Colocar o açúcar num tacho em lume médio e deixar derreter. É preciso cuidado e atenção neste processo, pois pretende-se que fique um caramelo dourado, mas não demasiado, e qualquer distração pode levar a um pequeno desastre culinário.
Quando o açúcar estiver derretido e já houver, de facto, caramelo, retirar do lume e adicionar a manteiga e com a colher de pau ou com uma vara de arames, mexer bem, para incorporar a manteiga no caramelo.
Em seguida, adicionar as natas aos poucos e misturar bem entre cada adição, para que fiquem bem incorporadas.
Levar o molho de caramelo novamente ao lume, acrescentar os 50ml de água quente, misturar muito bem e deixar cozinhar durante aproximadamente 2 minutos para desfazer alguns cristais de açúcar que se tenham formado.
Transferir para uma taça e deixar arrefecer.

E assim o vosso caramelo caseiro está pronto!

Depois de arrefecer totalmente, o caramelo ficará mais espesso e terá a consistência esperada. 
Pode ser guardado em frascos, no frigorífico.


Arroz de Cenoura e Algas Wakame - Rice with Wakame Seaweed and Carrots

Há uns meses vi (no Aldi, salvo erro) uma embalagem com algas wakame desidratadas. Nunca tinha experimentado cozinhar com algas, embora não sejam incomuns no mercado.

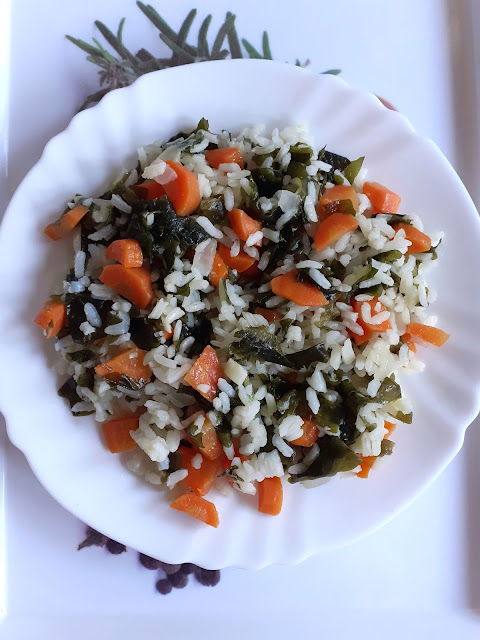
Pois bem, decidi experimentar as algas num arroz de cenoura e ficou delicioso!

As algas wakame têm um sabor muito interessante: é como se estivesse ali um vegetal de folha verde, mas com um toque mais marítimo.


A receita é muito simples:


arroz com algas wakame


Ingredientes:

1 cebola pequena

2 dentes de alho

Azeite qb

2 chávenas de água

1 chávena de arroz

3 cenouras

10g (aprox) de algas wakame desidratadas

Sal qb


Algas wakagame
Algas wakame já reidratadas


Preparação:

Colocar as algas wakame desidratadas numa taça e colocar água até cobri-las - desta forma vão reidratar sem depois retirar água ao arroz durante a cozedura.

Num tacho, colocar azeite, cebola e alho e refogar ligeiramente.

Acrescentar água, colocar as cenouras descascadas e cortadas (gosto de cortar de forma a que as rodelas fiquem em metades ou quartos), e esperar que a água ferva.

Quando estiver a ferver, acrescentar o arroz, as algas wakame e o sal. Misturar.

Deixar levantar fervura novamente, misturar e provar o sal. Retificar, se necessário.

Cozinhar, em lume brando, sem cobrir o tacho na totalidade (para evitar que crie espuma e um potencial desastre).

Servir como acompanhamento de carne, peixe ou de um prato vegan.


******************************


ENGLISH


Some time ago while shopping at Aldi (if I am not mistaken) I noticed they were selling some nice packages of dehidrated wakame seaweed. I never tried seaweed when cooking, even though it is not something uncommon in the market.

So I decided to try wakame in rice, and it turned out delicious!

Wakame seaweed have a very interesting flavour: it's like you have another leafy vegetable in there, but with a "sea taste".


This is a very simple rice recipe:


rice with wakame seaweed


Ingredients:

1 small onion

2 cloves of garlic

Extra virgin olive oil

2 cups of water

1 cup of rice

3 carrots

10g (aprox) of wakame seaweed

Pinch of salt


Instructions:

In a bowl, put 10g of dehidrated wakame seaweed and cover them with water - they'll absorb the water and won't "steal" it to the rice when cooking.

In a pan, braise onion and garlic with olive oil.

Add water, the carrots (peeled and cut into halved or quartered slices), and bring it to a boil. Then, add the rice, the previosly rehidrated seaweed and a pinch of salt. Stir.

Bring it to a boil once again, stir, and taste the water to check the salt. Add some more, if needed.

Cook in low heat, and position the lid in a way that doesn't cover the pot completely (to avoid the formation of foam and a potential disaster).


Serve as a side dish for a meat, fish or vegan dish.

Cheesecake (de Iogurte Grego) de Maçã - (Greek Yogurt) Apple Cheesecake

Este cheesecake de maçã que hoje partilho convosco foi daquelas ideias que surgiu de repente no meu cérebro que está em "modo Outono total". Haja maçãs, canela, sabores quentes e doces e um forno ligado, que aquece a cozinha, que já de si se quer quentinha.

Aviso desde já, que é um delicioso cheesecake de iogurte grego.


cheesecake de maçã


Ingredientes:


Base:
200g de bolacha Maria
100g de manteiga

Recheio (ingredientes à temperatura ambiente):
600g de iogurte grego (usei caseiro)
150g de açúcar
1 pacote de açúcar baunilhado (ou essência de baunilha em quantidade equivalente)
1 pitada de sal
3 ovos
1,5 c. sopa de amido de milho
1 maçã grande
1 c. chá de canela

Cobertura:
2 maçãs grandes
1 c. chá de canela
1 pitada de noz moscada
2 colheres de sopa de açúcar
1 colher de sopa de manteiga


Preparação:


Pré-aquecer o forno a 180 ºC.


Base:
Derreter a manteiga. Triturar as bolachas. Misturar a manteiga derretida com as bolachas. Colocar numa forma de mola previamente untada com manteiga e com o fundo forrado a papel vegetal, e alisar, pressionando ligeiramente, e abrangendo também um pouco as laterais da forma. Reservar.

Recheio:
Cortar a maçã aos cubos e, num recipiente, misturar bem com a canela (podem acrescentar também 1 c. de sopa de açúcar). Reservar.
Bater bem o iogurte grego com o açúcar, a pitada de sal e o açúcar baunilhado durante 3 min até estar tudo bem dissolvido.
Adicionar os ovos, um a um, batendo bem entre cada adição.
Por fim, acrescentar o amido de milho e bater bem.
Colocar a maçã aos cubos com canela na base e sobre esta, verter o creme e levar ao forno durante aproximadamente 30-40 min. (O tempo de cozedura real dependerá da altura da vossa forma)
Deixar arrefecer completamente e levar ao frigorífico durante 3h.


Cobertura:
Nota: A cobertura pode ser preparada com antecedência e guardada no frigorífico, ou uns minutos antes de servir o cheesecake.
Num tacho, colocar as maçãs cortadas aos cubos, a canela, a noz moscada e o açúcar. Deixar cozinhar um pouco em lume brando, misturando sempre. Quando as maçãs tiverem a consistência desejada (poderão ficar mais ou menos macias, dependendo da preferência), acrescentar a manteiga e misturar bem.
Retirar do lume e deixar arrefecer totalmente antes de colocar sobre o cheesecake.


Antes de servir o cheesecake de maçã, passar uma faca entre o cheesecake e a forma para garantir que está totalmente solto, abrir a forma, remover com cuidado e passar o cheesecake para um prato de bolo ou outro suporte. A cobertura pode ser colocada depois deste passo.


Cheesecake de iogurte grego


******************************


ENGLISH


This greek yogurt apple cheesecake that I am sharing with you today is the result of a sudden idea in my Autumn-filled brain: apples, cinnamon and all sorts of spicy and sweet flavours, along with the warmth of an oven.


greek yogurt apple cheesecake


Ingredients:

Crust:
200g of any plain sweet biscuits (e.g. digestive)
100g of butter

Filling (all at room temperature):
600g of greek yogurt (used homemade)
150g of sugar
1 packet of vanilla sugar (8g) (or an equivalent amount of vanilla essence)
1 pinch of salt
3 eggs
1 + 1/2 tbsp of corn starch
1 large apple
1 tsp of cinnamon

Garnish:
2 large apples
1 tsp of cinnamon
1 pinch of nutmeg
2 tbsp of sugar
1 tbsp of butter


Instructions:


Preheat the oven to 180 ºC.


Crust:
Melt the butter. Turn the biscuits into crumbs, add the melted butter and mix. Line the bottom of a springform pan with parchment paper and butter the sides. Press the crumbs on the bottom of the pan and up to the sides.

Filling:
Peel and dice the apple and, in a bowl, mix it well with cinnamon (you can also add 1 tbsp of sugar). Set aside.
Beat the greek yogurt with the sugar, a pinch of salt and the vanilla sugar until these elements are well dissolved.
Add the eggs, one by one, beating well on each addition.
Finally, add the cornstarch and beat well.
Put the diced apple that you set aside on the springform pan, on top of the crust, and pour the greek yogurt filling. Bake for aprox. 30-40 min. (Baking time will depend on the size of your pan)
Let it cool down completely and then refrigerate it for at least 3h.


Garnish:
Note: The garnish can be prepared in advance and stored in the fridge - or it can be prepared minutes before serving the apple cheesecake.
In a pan, add 2 peeled and diced apples, cinnamon, nutmeg and sugar. Let it cook for a while on low heat, and keep stirring. When the apples have the desired consistency (harder or softer, depending on what you prefer), add the butter and mix well.
Remove the pan from the heat and let the apples cool down completely before placing them on top of the cheesecake.


Before serving the apple cheesecake, use a knife between the cheesecake and the pan, to make sure it is not sticking to the pan. Open the pan, remove it very carefully and transfer the cheesecake to a dish or another kind of base. The garnish can be added after this step.

Soufflé de Atum - Tuna Soufflé

soufflé de atum


Para quem nunca fez um soufflé, quando perceber o fácil que é fazer um, vai querer fazer soufflés de tudo e mais alguma coisa.

Além disso, é uma forma interessante de comer ovos e peixe, sem acrescentar muitos ingredientes - e diga-se: para um nome tão “pomposo”, é um prato extremamente light, mas saciante.
Deixo-vos aqui uma receita muito simples de soufflé de atum, fácil e rápida de preparar, sem extras (que poderia ter, mas o objetivo é ser uma receita simples), mas que vai ser certamente um sucesso.


Souffle de atum


Ingredientes (para 3/4 pessoas):

200 g de atum (cerca de 3 latas pequenas)
50 g de farinha
50 g de manteiga
250 ml de leite
4 ovos
Sal e noz moscada a gosto


Preparação:

Desfazer o atum num prato e reservar.
Num tacho, derreter a manteiga e, com uma vara de arames, misturar com a farinha, sem deixar queimar. Assim que estes dois elementos estiverem misturados, acrescentar o leite e mexer bem. Temperar a gosto, e deixar engrossar, mexendo sempre com a vara de arames, para que não pegue ao fundo.

Assim que o béchamel estiver pronto, retirar do lume, acrescentar o atum, provar novamente e retificar os temperos, se necessário. Reservar e deixar arrefecer um pouco.

Untar uma assadeira funda com manteiga e farinha. Pré-aquecer o forno a 200 ºC.

Separar as gemas das claras. Bater as claras em castelo. Desfazer as gemas com um garfo e misturar muito bem no preparado de atum, até ficar tudo homogéneo.

Retirar um quarto das claras em castelo, misturar no preparado de peixe para “soltar” um pouco. Depois, envolver as restantes claras com cuidado, para não retirar o ar, mas tendo cuidado para que fique homogéneo.

Colocar na assadeira, e levar ao forno a 180 ºC durante cerca de 40 mins. Eu deixo o meu soufflé cozer bem, por isso, não deverá tremer muito no meio.

Servir de imediato, simples ou acompanhado de uma salada.
Para quem gosta de pratos frios, depois de arrefecer continua a ser uma delícia.


******************************


ENGLISH


When you realize how easy it is to make a souffle, you'll want to make souffles of "everything" even if you've never made one before.

This tuna souffle is a simple recipe, of quick and easy preparation, that is a very interesting and different way of eating tuna and eggs, without too many ingredients. It's also a very light dish, despite the "fancy" name.

Tuna souffle


Ingredients (serves 3-4):

200g of canned tuna
50 g of flour
50 g of butter
250 ml of milk
4 eggs
Salt and nutmeg to taste


Method:

In a pan, melt the butter and with a whisk, mix the flour very well, without letting it burn. As soon as these two elements are well mixed, add the milk and mix well. Season to taste and let it thicken, while mixing continuously, to avoid the bechamel sauce to stick to the bottom of the pan.

As soon as the bechamel sauce is ready, turn off the heat and add the tuna. Taste again and correct the seasoning if needed. Set aside and let it cool down a bit.

Butter and flour a deep baking dish. Preheat the oven to 200 ºC.

Separate the eggs from the whites. Beat the egg whites until soft peaks. Break the yolks and slightly beat them with a fork. Add the yolks to the bechamel with tuna, mixing very well, until it is all well combined.

Take a quarter of the whites, mix it with the "enriched" bechamel to loosen it a bit. After this, incorporate the remaining egg whites, very carefully, as you don't want to lose air. However, make sure it is well combined.
Pour the mix in the baking dish and take it to the oven, at 180 ºC for about 40 mins. I let my souffle cook well, so it shouldn't jiggle too much in the middle when it comes out of the oven.

Serve immediately, just as it is, or with salad.
For those who like cold dishes, this tuna souffle is still delicious after cooling down.

Dia Mundial do Pão 2020 - World Bread Day 2020

Eis que hoje é dia mundial do pão!

E, para assinalar a data, nada melhor do que uma receita de um pão de forma caseiro, bem fofinho e delicioso.
A vantagem de ser um pão feito em casa, é que sabem sempre o que estão a colocar, e sabem que os ingredientes usados são "reais" - nada de nomes complicados, ou que não conhecem, nada de conservantes. E assim, usufruem de todas as vantagens do pão de forma, com o enorme bónus de ser extremamente delicioso, cheio de sabor.

pão de forma caseiro


Vamos à receita:


Ingredientes:

450g de farinha (usei espelta, podem usar trigo)
250ml de água morna
50g de manteiga
1 + 1/2 c. chá de sal
2 colheres de sopa de açúcar (usei mascavado - podem usar outro)
2 c. chá de fermento de padeiro seco


Preparação:

Derreter a manteiga e deixar arrefecer.
Aquecer a água até ficar morna e dissolver na água o açúcar e o sal.
Num recipiente, colocar a farinha e o fermento. Misturar.
Abrir uma cova no meio da farinha e colocar a água (com açúcar e sal bem dissolvidos) e a manteiga derretida.
Começar a amassar até formar uma bola que se despegue do recipiente.

Cobrir com um pano e deixar repousar 30 minutos.
Após 30 minutos, amassar durante cerca de 10 minutos, de forma a obter uma massa lisa e elástica.

Cobrir novamente com um pano e deixar levedar cerca de 2h (até, pelo menos, dobrar de volume). Depois de duplicar o volume, retirar a massa, com cuidado, para uma superfície ligeiramente enfarinhada. Polvilhar a massa com farinha e, com as mãos, achatar cuidadosamente, de modo a formar um retângulo, de largura um pouco menor à da forma que vão utilizar. 

Enrolar, em forma de cilindro, como se fosse uma torta.
Forrar uma forma com papel vegetal, e colocar o pão já moldado, com a "costura" virada para a base da forma.

Deixar levedar mais 30 minutos, enquanto o forno aquece, a 170 ºC.

Após este tempo, colocar o pão a assar durante 30 a 40 minutos - estará pronto quando estiver bem dourado.


******************************


ENGLISH


So today is the World Bread Day!

And the best way to celebrate it is with a delicious and very tender homebaked bread!


Ingredients:

450g of flour (I used white spelt flour, you can replace it with wheat)
250ml of lukewarm water
50g of butter
1 + 1/2 tsp of salt
2 tbsp of sugar (I used muscovado, feel free to replace it)
2 tsp of dry yeast


Method:

Melt the butter and let it cool down.
Warm the water and dissolve sugar and salt in it.
In a bowl, mix the flour with the yeast.
Form a hole in the center and pour the water (with sugar and salt) and the melted butter.
Start to knead until the dough stops sticking to the bowl.

Cover with a clean kitchen towel and let it rest for 30 mins.
After 30 mins, knead for about 10 mins until the dough is smooth and elastic.

Cover with the kitchen towel once again, and let it rest for 2h (until it doubles in volume). After this, carefully remove the dough from the bowl and place it in a lightly floured surface. Sprinkle a bit of flour on the dough and, with your hands, flatten it, forming a rectangle, slightly shorter than the pan you are going to use. 

Roll the dough, as if it was a swiss roll.
Line the pan with baking paper and place the rolled dough, with the "seam" turned to the base of the pan.

Let it rest for 30 mins, while the oven heats to 170 ºC.

Bake the bread for 30 to 40 mins - it will be ready when the top has turned golden.


BOLO DE AMEIXAS - PRUNE CAKE

Bolo de ameixas


Apercebi-me que com o Outono, a quantidade de bolos e doces que quero fazer passou a ser tão grande, que duvido muito que os faça todos.
Aqui vos deixo mais uma receita de um bolo de ameixas que foi muito apreciado cá em casa.


Bolo de ameixas


Antes de fazer o bolo:


Num frasco, colocar ameixas secas e cobrir com vinho do Porto. Tapar o frasco. Deixar as ameixas em vinho durante 1 a 2 dias (podem deixar mais tempo - quanto mais dias, melhor).


INGREDIENTES:

3 ovos
150g de açúcar (usei amarelo)
100g de manteiga
50ml de leite
Meia colher de chá de canela  
250g de farinha (usei espelta)
1 colher de sobremesa de fermento
200g de ameixas descaroçadas e cortadas em pedaços pequenos
2 colheres de sopa de vinho do Porto (onde estiveram as ameixas)


PREPARAÇÃO:

Pré-aquecer o forno a 180 ºC.
Bater os ovos com o açúcar até formar uma espuma fofa.
Acrescentar a manteiga à temperatura ambiente (estará macia) e bater.
Adicionar o leite, a farinha, a canela e o fermento, e bater até incorporar.
Colocar as ameixas escorridas aos pedaços e 2 colheres de sopa do vinho em que as ameixas estiveram. Misturar bem.
Levar ao forno durante 40 a 50 minutos - verificar com um palito e, quando sair seco, o bolo estará pronto.


*******************************


ENGLISH


I just noticed that this Autumn I have an incredible amount of recipes of cakes and other desserts that I want to make - but I believe I won't be able to make (and eat) them all before the end of Winter.
So today I am sharing with you the recipe for a delicious prune cake that was a success with my family.


Prune cake


Before making the cake:

In a jar, put prunes and cover them with Port wine. Cover the jar and let it rest for 1 or 2 days (you can leave for longer, the plums will get better)


INGREDIENTS:

3 eggs
150g of sugar
100g of butter (room temperature)
50ml of milk
1/2 tsp of cinnamon 
250g of spelt flour
2 tsp of baking powder
200g of chopped prunes (pitted)
2 tbsp of Port wine (where the prunes rested)


METHOD:

Preheat the oven to 180 ºC.
Beat the eggs with sugar until foamy.
Add butter and beat.
Add milk, flour, cinnamon and baking powder, and beat until combined.
Add the prunes and 2 tbsp of the wine they were in. Mix well.
Bake for 40 to 50 mins - when a toothpick comes out clean, the cake is ready.

MOUSSE DE CAFÉ E BAUNILHA - COFFEE AND VANILLA MOUSSE

Mousse de Café e Baunilha


Já tinha publicado esta receita no Instagram, e finalmente está aqui no blog!

A Mousse de Baunilha e Café!
Sabe bem em qualquer ocasião e é muito fácil e rápida de fazer!


INGREDIENTES:

6 claras (ovos médios)
100 g de açúcar

Para a base de baunilha:
200 ml de natas
50 g de açúcar
2 pacotes de açúcar baunilhado (ou 1 vagem, ou quantidade equivalente de extrato)

Para a base de café:
200 ml de natas
50 g de açúcar 
5 c. chá de café instantâneo


PREPARAÇÃO:

Para ambas as bases (a preparar em recipientes diferentes): colocar os ingredientes dentro do recipiente e bater até espessar. Reservar.

Noutro recipiente, bater as claras em castelo com o açúcar.

Envolver metade das claras na mistura de baunilha e envolver a outra metade na mistura de café.

Servir a mousse de café e baunilha em taças ou copos e levar ao frigorífico até servir.


*******************************


ENGLISH


This is the perfect quick and easy dessert that will be a hit on any occasion!
And with a plus: it doesn't need a stove or an oven!


I had already published this recipe in Portuguese (my native language) on my Instagram.
Now it is finally available to all my readers!


INGREDIENTS:

6 egg whites (medium sized eggs)
100g of sugar


For the vanilla base:
200ml of whipping cream (very cold)
50g of sugar
2 packets of vanilla sugar (8g each)


For the coffee base:
200ml of whipping cream (very cold)
50g of sugar
5 tsp of instant coffee


METHOD:

For each base, in different bowls, add all the ingredients to the bowl and with an electric mixer, beat everything until it's thick. Set aside.

In another bowl, beat the egg whites with sugar until it forms soft peaks.

With a spatula, incorporate half of the egg whites in the vanilla mixture and incorporate the other half of the egg whites in the coffee mixture. Be careful, as you want to preserve as much air as possible.

Serve in dessert bowls or glasses and keep it in the fridge until it is time to serve.

Coffee and Vanilla Mousse


Receita: Torta || Recipe: Jam Roll

rocambole, jam roll, rolled cake, torta


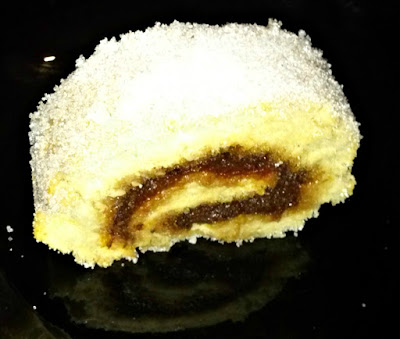
Hoje é dia de vos apresentar uma receita muito simples e fácil: a famosa torta  (BR: rocambole).

É muito interessante e incrível ser uma sobremesa tão fácil de fazer, e tão bonita e deliciosa ao mesmo tempo.
É daquelas receitas a que se pode recorrer em caso de pressa para apresentar uma sobremesa caseira.

A sua versatilidade também é impressionante: a torta pode ser recheada de tantas formas diferentes - doce de ovos, doce de frutas, Nutella!, enfim...

Neste caso usei um doce caseiro de morango e beterraba (não, não sou assim tão fã da beterraba - nem se dá por ela no doce).


Today I'm bringing to you a simple and quick recipe, of a great dessert: Jam Roll (aka, Jelly Roll, Swiss Roll, Rolled Cake, Roulade.... so many rolls and roundness I found for this recipe)
This is a very common cake in Portugal. You can find it in any coffee shop. Usually these rolled cakes are filled with confectioner's custard on coffee shops and bakeries.

It's quite incredible how simple this dessert is, and yet, so delicious.
If you have a guest and you are rushing and you really want to offer a homemade cake, please do try this recipe.

You can fill it with any kind of jam, with Nutella, or cream - whatever you like!

In this case I filled my jam roll with a strawberry and beetroot homemade jam (no, I'm not a huge fan of beetroot - the flavour of it is absolutely hidden).


homemade jam roll, torta com doce caseiro


Vamos então à receita:

Ingredientes:


3 ovos
4 c. sopa açúcar
5 c. sopa farinha c/ fermento
Doce/recheio à escolha


Preparação:


Pré-aquecer o forno a 170ºC
Untar um tabuleiro retangular. Forrar com papel vegetal (que vai aderir à gordura no tabuleiro e não se vai mover quando verterem a massa) e untar também o papel vegetal.
Separar as gemas das claras para dois recipientes diferentes.
Bater as claras em castelo e reservar.
Adicionar o açúcar às gemas e bater até dobrar o volume e a mistura ficar fofa.
Adicionar a farinha e bater.
Adicionar as claras. Envolver cuidadosamente com uma espátula.
Colocar no tabuleiro, alisar a superfície e colocar no forno durante 15 minutos ou até o palito sair seco.


Enquanto a massa está no forno, disponham um pano de cozinha limpo sobre a mesa ou bancada e polvilhem com açúcar granulado.

Assim que o bolo estiver pronto, utilizem o papel vegetal para ajudar a tirá-lo do tabuleiro e virem-no para o pano (a parte de cima do bolo é a parte que vai entrar em contacto com o pano).
Espalhar o recheio escolhido.

Depois, com a ajuda do pano e com cuidado, comecem a enrolar. É um bolo muito fofo, por isso é preciso enrolar com delicadeza, mas com alguma firmeza. (aqui deixo um link que pode ser de ajuda para enrolar. É outro tipo de torta, mas o método é o mesmo - há outros métodos).
Deixar descansar. Se acharem que a torta "aguenta", podem colocá-la num prato antes de arrefecer.
Se perderam um pouco de açúcar ao enrolar, podem sempre polvilhar mais um pouco por cima da torta.


receita de torta com doce caseiro
A torta, antes de cortar // The cake, before cutting


Let's get to the recipe then:

Ingredients:


3 eggs
4 tbps sugar
5 tbsp self-raising flour
Jam / Filling of your choice


Method:


Pre-heat the oven at 170ºC
Grease a baking pan. Line it with baking paper (it will stick to the grease in the pan and won't move around when you pour the batter) and grease the baking paper too.

Sepparate the yolks from the whites in two different bowls
Whip the egg whites until you have soft peaks. Reserve.
Add sugar to the yolks and beat until the mixture doubles its volume and gets fluffy
Now add the flour and mix.
Fold the egg whites in the mix with a spatula.
Pour the batter in the baking pan, smooth the surface and put it into the oven for 15 mins or until a toothpick comes clean.


While the cake is in the oven, grab a clean dish cloth, put it on the table, and sprinkle it with sugar.

As soon as the sponge cake (yes, it basically is a sponge cake) is ready, use the baking sheet to get it out of the pan, and lay it on the dish cloth (the top part of the cake is the part that will get onto the cloth). 
Now spread the filling of your choice.

Then, with the help of the towel, start to gently roll the cake. Gently - it is a very fluffy cake - but tightly. (here is a video on how to roll the cake. It is a different kind of rolled cake, but this is the method I use - there are other methods),
Let it rest. If you feel the roll is sturdy enough you can get it onto a plate before it cools down.


If you think it lost a bit of sugar on the rolling, feel free to sprinkle a bit more on top of the jam roll.

Após o corte  //  After cutting


E é isto!
É um bolo tão rápido, tão bonito e tão delicioso!

Se experimentarem, contem-me como correu e que recheio utilizaram.


And that's it. 
It is so quick, it looks so good, and it's so yummy.

If you try it, please let me know the experience and what filling you chose. (and if you liked this recipe don't forget to share)